Are you wondering how to quickly organize items such as papers, receipts, office supplies, or clothes?
Do you get stuck when it comes to sorting through everything?
In this post, you’ll learn how to quickly organize items using a broad-to-narrow sorting technique.
The idea behind this technique is simple.
You first organize items into broad categories and then organize items into narrower categories at a later date.
This technique saves a lot of time and energy because it requires you to make an immediate decision and continue on with your work.
Once you’ve finished your first round of sorting, you can complete your second round of sorting at a later date and time.
Sort items into broad categories.
The first step in quickly organizing items is to sort and separate items into broad categories.
This method allows you to create some sort of order right from the start, without needlessly focusing on the nitty-gritty details.
Now, just how broad of a category is broad? You want to sort items so they are easily distinguishable from one another.
In other words, you should be able to get a general idea of a collection, just by looking at it.
Here’s a simple example for you. Let’s say you have a large pile of papers sitting on your desk in your home office.
At first glance, the pile looks to be quite chaotic, little scraps of paper here, and large papers there.
Yet if you took a few moments to leaf through the pile, you would start to see some striking similarities.
You’d recognize larger pieces of paper as household bills, smaller pieces of paper as coupons, and in-between and larger pieces of paper as receipts.
In this case, the easiest way to sort items would be to sort them into three separate categories of bills, coupons, and receipts.
Once you’ve sorted items into these broad categories, you can then focus on sorting items into smaller categories, such as bills by company, date, and so on.
As you sort items into broad categories, it’s important to limit your time spent glancing at each item.
Remember, the idea is to sort items quickly; a few seconds’ glance should be all that you need to identify something.
Save detective work for another time.
As you sort through any collection of materials, you’ll probably come across items that require more inspection or a series of actionable steps.
From our example above, you might find a recent bill that needs to be paid in your stack of papers, or you may find a sticky note with a reminder to confirm an doctor’s appointment.
Naturally, you’ll want to review and address these items, but you’ll also want to finish your sorting work.
The best thing to do in a situation like this is to create a separate “to-do” pile for these items.
This way, you can continue on with your sorting work, without worrying about misplacing or forgetting an item.
Once you’ve finished your sorting session, you can turn your attention to reviewing, handling, and processing items.
Don’t have time to deal with items right at this very moment?
Schedule an hour or two into your calendar over the next few days or week to sit down and go through everything.
Create temporary storage for sorted items.
Once you’ve finished sorting items into broad categories, it’s important to keep everything contained and labeled.
You’ll want to be able to pick up where you left off, be it in two days’ or two weeks’ time.
This process doesn’t have to be anything fancy, you just want to keep items together and be able to identify them easily.
Chances are this temporary storage won’t be the final storage solution you’ll use for the recently sorted items.
This is 100% okay! Your organization project is a work is progress.
You can think of this temporary storage arrangement as an intermediate stage in your organization work.
If we were to use our paper example from above, here’s a few ways you might go about temporarily storing items:
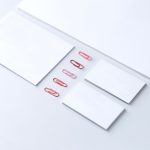
- Sort papers into their respective piles (bills, receipts, coupons, to-do) set them aside on an unused table, filing cabinet, or counter top, fasten with a large rubber band, and use a sticky note to label each pile.
- Place papers into four separate boxes or containers and label each of the boxes respectively with a sticky note or label.
- Store papers in four separate accordion folders and label each respectively with a sticky note or label.
Now that you’ve sorted and labeled broad categories, you can take your time sorting each category further, as you so desire.
How about you? How will you use this quick-sort technique in your next organizing project? Join the conversation and leave a comment below!


0 Comments